
Over the time, all the informations about the kj mk1 (and mk2) I’ ve worked on have been scattered on about 15 different articles on my page. Moreover, the initial and most complete article describing my journey upgrading my very first mk1 may be quite messy to ones and it was written in French, making it hard to translate for others… (actually, most of the visits on my page regarding mk1 are from foreign airsoft enthusiasts).

I think it’ s time to regroup all of these informations in one main article, THE article containing all the essential informations about mk1 fine tuning and upgrade, internally and externally speaking!
Let’ s start with part 1: internal mods!
Internal mods
We have to be honest: Stock mk1/ mk2 sucks. That’ s a fact, those replicas are hard hitters and poor performers, the only goods being that they’ re cheap and that’s there is lot of room for improvements with such a simple operating mode and simple mechanical parts.
Hammer spring mod
Initially, KJ equipped his mk1 with a quite strong/ long hammer spring, resulting in a somehow heavy trigger-pull. This also had limited consequences on gas consumption and bbs velocity of the replica.
As a solution, some people simply recommend removing the 6mm bearing ball underneath this spring to easily reduce its preload, but this ball is there for some good reason: doing so and the spring will rest directly over the non-even surface of the disassembly lever, resulting in some compressions inconsistency, and may also end with a gritty disassembly.
The best way to reduce the preload in my opinion is to shorten the spring itself. By removing 6mm or so from this spring we still have a preload of about 1mm which is enough for the gun to operate correctly. What’ s important here is not what you cut out, but what is left: As little as it is, the spring still needs to have some sort of preload.

This will result in a lightened trigger- pull, a sightly reduced gas consumption and a few FPS drop.
So, why not just changing the spring for a weaker one, as it could also reduce further more the power output of the gun? Because it can lead to inconsistant and/ or improper valve strikes with stronger gases. And it may further increase velocity variations from a day to another, in case of temperature change (resulting in gas pressure variations) because of the weaker strike.
Note: This mod may be useless on newer mk1, as it seems that kj reconsidered this point and is now shipping mk1 with already shortened spring (the two latest mk1/ mk2 I’ ve worked on were already improved).
Hammer mod
Now we need to reduce the amount of gas released when the hammer strikes the valve in order to lower efficiently the mk1′ s fps. This can be achieved in two ways:
- By reducing the gas outlet port diameter of mags. that’ s the solution chosen by KJ Works on it’ s latest releases, but the worst one in my opinion: different mags will have different output velocity in this case ( I registered a 50 FPS gap between 2 mags in a previous article!)

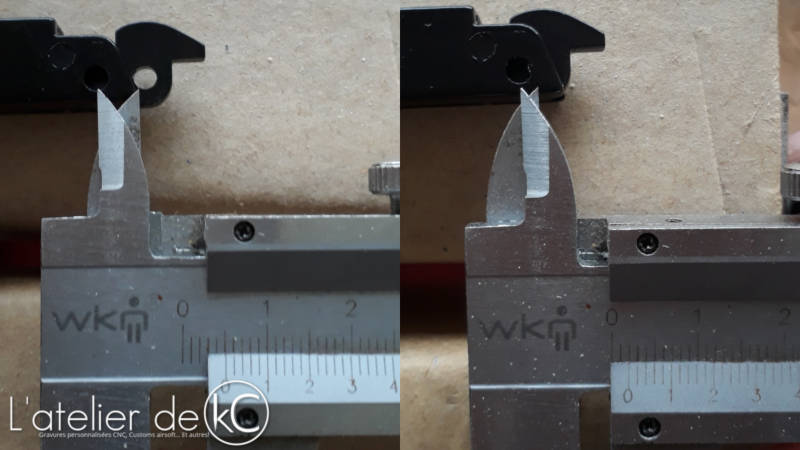
- By reducing the hammer’ s strike pin length. It will lessen the valve opening, liberating lesser gas on each strike thus reducing the output velocity. It can be done by carefully grinding off the hammer’ s strike pin to the desired length, or with a complete modification of the hammer in order to create an adjustable strike pin. In both case, you’ ll have to adjust the remaining length depending on the desired FPS, the gas used… I’ m afraid I can’ t give any measured values, each gun will be different!
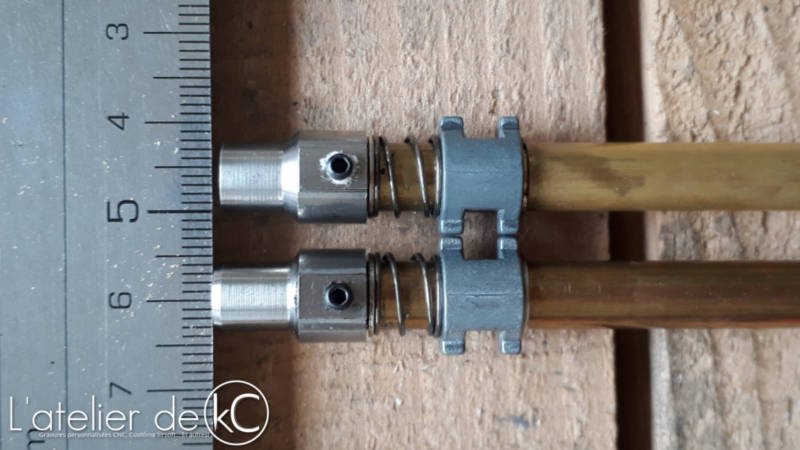
Shortened strike pin:


Adjustable hammer:

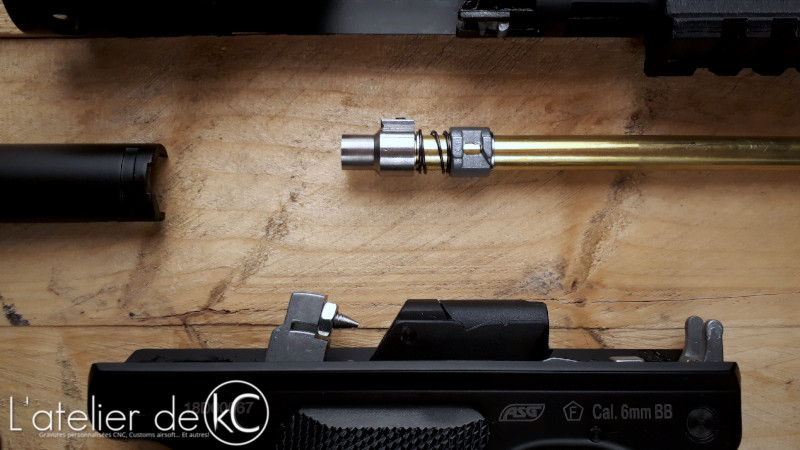
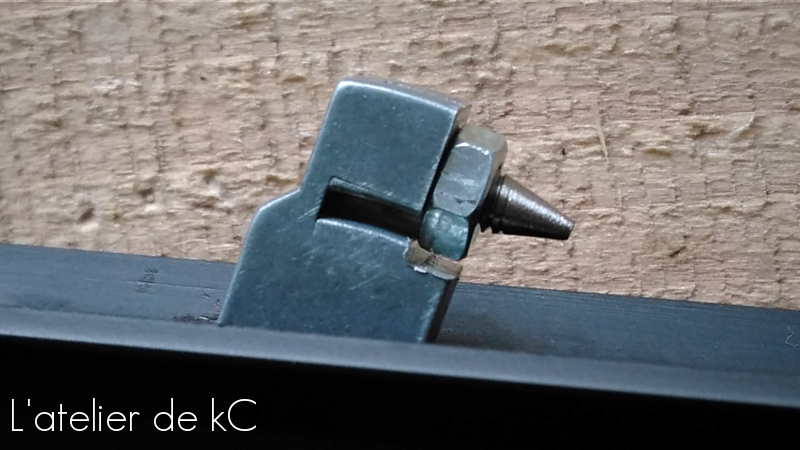
I’m using stainless steel set crew for this mod, so the strike face won’t wear easily (even more resistant than the stock pin)
This leads to 2 major improvements for the mk1: lower FPS and a greatly reduced gas consumption!
With this mod, you can easily « fine tune » the output velocity of your ruger (I can go as low as 200fps and up to 430fps with my adjustable hammer). And the more you decrease the velocity, the more you increase autonomy of the gun. Set at 280fps, I get 10+ mags with a single gas fill!
Hop up chamber mods
– O ring mod:
Out of the box, mk1’s hop up can behave quite differently depending on how fast you pull the trigger, or if you are aiming upward or downward.
This can be quite managable with a quick and constant trigger pull of the whole double action on each shot, but I personnaly prefer to go « to the wall », stay there and only have to press the last few mm to take the shot, which is quite unreliable with the mk1.
A simple way to improve the hop effect consistency and efficiency, no matter how you pull the trigger, is to add a 6mm x 1mm O ring inside the chamber, the same kind of O ring that can be found on some bb loaders. it will act as a « BB retainer », and prevent BBs from moving around too much in the chamber, resulting in a more stable positioning of the bb under the rubber.

This mod is compatible with Steel machined chamber and die cast version, even with mk1/ gemtech oasis with flattened area under the inner barrel:


– Chamber shortening mod:
On mk1/ mk2 I work on, I also reduce the chamber length, for 3 reasons:
- compensate for the added O- ring length;
- Reduce even more the room available for the BB to move inside the chamber;
- Reduce the extra- pull needed on the trigger to « seal » the chamber against the mag gas outlet.


You can safely remove 1mm of material, maybe more if you proceed carefully by checking the sealing each time.
– Jon’s mod:
In order to improve the hop efficiency with heavy bb’ s, Jon had the idea to replace the m3 adjusting screw with a m4 one. 1mm makes a big difference here, that’ s 76% more contact surface!


On it’ s own, this mod actually does make heavy bb’ s use easier… but little overall difference, as the replica still encounters its biggest issue: the lack of consistency. However, once combined with my own mods, this makes a huge difference! Heavy bb’ s are easily lifted and reliability/ consistency is greatly increased.
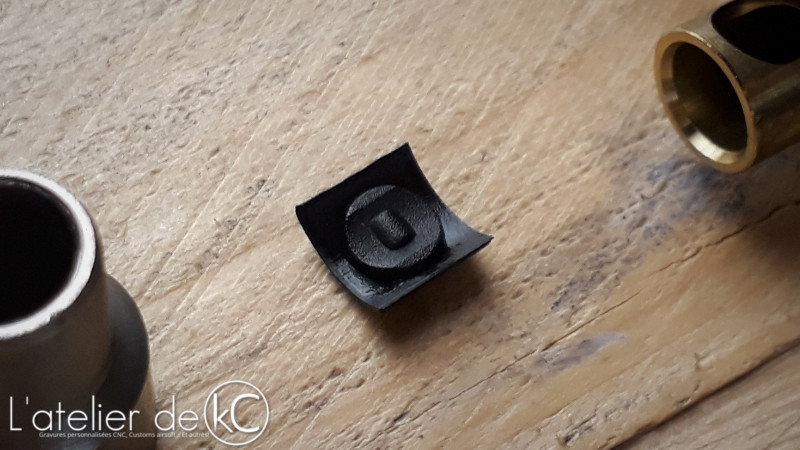
– G&G hopup rubber:
I find this rubber having the same effect as the Jon’ s mod: it improves the lift efficiency with heavy bbs. Thus it’ s up to you whether you prefer DIY or spending a little on a plug & play solution!

It could also be a good idea to switch to this rubber if your mk1/ mk2 came shipped with a non- flat rubber: to my mind, those non-flat rubber are pointless, as they don’ t improve consistency, nor the efficiency of the lift.
That’s all folks for the technical upgrade/ fine tuning part, see you soon on Part II, External mods!
-kC-
If you liked this article, if you found it useful, or if you have any question about it, feel free to leave a comment and/or hit the « like » button below!

I don’t know if this will get to you, but this is a GREAT help to me. I have a KJ MK1, bought in 2022. I’ve read about the hop-up bucking being less than ideal and have searched for ways to improve it. The problem is, I live in Thailand and parts are VERY hard to get. I must buy from stores that are « in-country », as ANYTHING remotely associated with guns, air-guns or air-soft guns that is labeled as such on the packaging is seized at Customs and not returned. I’ve read this article and one in Arnie’s Airsoft that may help, as I want to run .32s or .35s in my pistol. Thanks for your work in sharing all this info.
J’aimeJ’aime
Thanks David! You are welcome, glad it helped 🙂
J’aimeJ’aime
I forgot to mention this in my earlier comment. THIS PART: » Out of the box, mk1’s hop up can behave quite differently depending on how fast you pull the trigger, or if you are aiming upward or downward. » I THOUGHT IT WAS ME! I am SO GLAD you mentioned this. Proof that it is sometimes the small things that mean a lot to your readers. And then this: « This can be quite manageable with a quick and constant trigger pull of the whole double action on each shot, but I personally prefer to go « to the wall », stay there and only have to press the last few mm to take the shot, which is quite unreliable with the mk1. » Again, I thought I was doing something ‘different’ on each shot to get the level of INconsistency I was experiencing. What I did was to develop a special two-handed ‘grip’: my right hand grips the pistol ‘normally’, index finger on the trigger. But my LEFT hand cups the base of the grip with the left’s index finger overlaying the tip of my right index as it sits on the trigger (it helps on that heavy pull!) and my left thumb pressing the back of the charging handle for stability. Quick Question: I will try and grind off 1mm from the hop-chamber tomorrow (I already have the O-ring ready). Should I bevel the outer surface so it’s like stock, or just a small bevel on the inner-rim? Thanks again for a great article.
J’aimeAimé par 1 personne
Thanks for your message! You don’t have to make full bevels on the surface, just make sure there is no sharp edges.
J’aimeJ’aime
I hate to keep bothering you with questions. Took a while to get ready for this. The hop-up screw is 3mm, so the hole is a threaded 3mm. Now I have a 4mm tap, should I drill out the 3mm hole and then run the tap or just use the tap to cut the new threaded hole? I’m afraid of drilling the hole out and then have the tap be left with insufficient material for the threads. My bit collection is not good, so I’d rather just try the tap straight without drilling if that would work. Spare parts for the MJ are impossible to get here and I’d hate to have to order a new hop-up chamber because I screwed up the adjustment hole. Thank you for all your great info
J’aimeJ’aime
Hi!
The rule is to drill a 3.3mm hole before m4 tap
Here is a chart:
Cliquer pour accéder à filetage-cote-pre-percage-t42-lmod1.pdf
J’aimeJ’aime
Hi! Thanks for the guide. how much better does the pistol become with all these mods? Does it rival a decent pistol with a precision barrel and upgraded hopup rubber?
I’ve tried to see if they make precision barrels for this model but it doesn’t seem to be the case
J’aimeJ’aime
Hi! Keep in mind that this is a cheap replica, mostly upgraded thanks to DIY modification. It wont compete with hi-end, expensive one. But it can still perform surpizingly well!
J’aimeJ’aime
Hello! I would also like to add to this, I replaced the barrel with an EDGI 6.01mm tightbore barrel. I’m running the carbine version and thus was able to put a 450mm long barrel in it. Gun runs magnificently with the mods and I’m able to hit someone from across the field with just .3g bbs!
I tried to do the m4 screw mod today but unfortunately it broke my hop chamber. Do I really have to get a 3.3mm screw tap before tapping it with an M4 screw tap?
J’aimeAimé par 1 personne
Hi, yes you have to drill it before, the m4 tap is not designed to widen the hole
J’aimeJ’aime